A prime goal during (sometimes the only goal) is changing the
look of the cabinets. Surprisingly often, cabinets that are otherwise in good
structural shape are demolished and replaced simply because the homeowner is
tired of their look. This is similar to getting rid of a perfectly good car just because
you don't like its color. In many situations, however, you can dramatically change
the look of your kitchen by a process known as , which gives most of the
benefits of cabinet replacement but at a fraction of the cost.
What Is Cabinet Refacing?
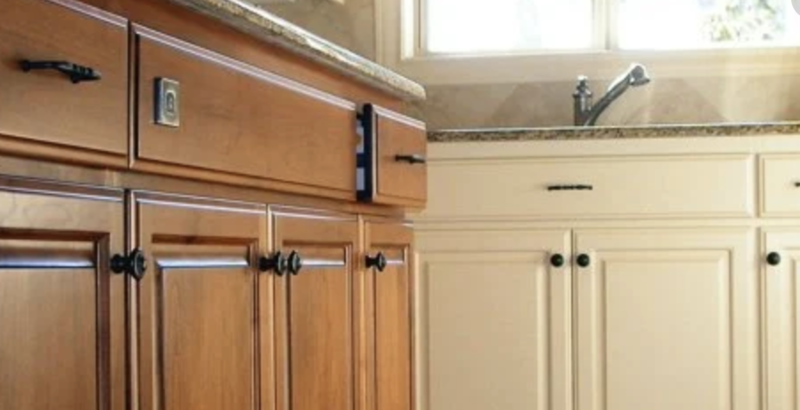
Cabinet refacing is essentially a replacement of the "skins"—replacing the
doors and drawer fronts and applying a new veneer over the existing surface of the
body ("carcass") of the cabinets. The hardware—the hinges, handles, and drawer
pulls—are usually also replaced during refacing.
How Refacing Works
Many firms specialize in performing cabinet refacing. A skilled and patient DIYer
can also perform cabinet refacing by buying a veneer kit containing the wood
veneers and application materials, then special-ordering cabinet doors and drawer
fronts. Either way, the process follows the same order:
Cabinet doors are removed; drawers are removed and their fronts are removed
(the rest of the drawers boxes remain intact).
The front portions of the cabinet boxes are covered, either with natural wood veneer or RTF (Rigid Thermofoil), a melamine-based product.
Cabinet sides are skinned with wood veneer or laminate.
New tex added, if necessary. Hinges in good condition can also be reused.
New doors and drawer fronts are installed.
New handles, drawer pulls, and other types of fixtures are usually installed. Existing hardware can also be reused if it is in good shape.
Optional accessories, such as , glass panels, lighting, or storage accessories are installed.
A cabinet refacing pro will usually require two to four days to perform this service,
depending on the size of your kitchen. A three-day schedule might look something
like this:
Day 1: Remove hardware, doors, and drawer fronts. Begin veneering. Pick up
and clean at end of the day.
Day 2: Continue veneering. Pick up and clean at end of the day.
Day 3: Finish veneering. Install and drawer fronts. Install hardware.
Make final adjustments
When doing this work yourself using kit materials, allow yourself a full week, at least, for the work.
Evaluating Cabinets for Refacing
Not every cabinet is a good candidate for refacing. This doesn't mean those old
cabinets are bad candidates, though, because in many cases older cabinet boxes
have sturdier construction than newer factory-manufactured boxes and will accept
new veneer and doors quite successfully. Good cabinets for refacing have these
elements:
Sturdy box construction made of plywood or MDF panels that are smooth and
in good condition.
New veneers require smooth solid surfaces in order to
adhere properly.
Face frames of solid hardwood. Good hardwood face frames will accept veneers
and can solidly anchor new doors.
Internal hardware (drawer tracks, internal storage elements) that are in good
shape.
If the drawers do not operate smoothly or if the cabinets are lacking in
shelving or storage accessories, the expense of refacing may not be worth it.
Cabinet refacing is essentially a replacement of the cabinet "skins"—replacing the doors and drawer fronts and applying a new veneer over the existing surface of the body ("carcass") of the cabinets. The hardware—the hinges, handles, and drawer pulls—are usually also replaced during refacing.
MN KITCHEN REMODEL CONTRACTOR.....
LOOKING FOR THE BEST CONTRACTOR?
best CRAFTMANSHIP FOR YOUR KITCHEN PROJECT!
Costs
Cabinets refacing cost less than replacing your , but
don't rush to cabinet refacing on the assumption that it is a dirt-cheap alternative to
new cabinets. Generally, refacing performed by an installation specialist costs about
50 percent of the cost of a new custom cabinet installation and about 70 to 80
percent of the cost of installing stock cabinets purchased off the shelf from home
improvement centers.